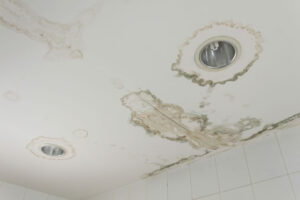
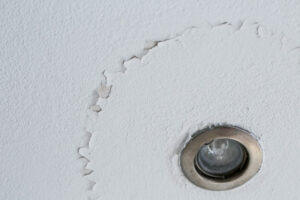
Don’t let those water stains hang over your head — a DIY fix is just a weekend away!
A water stain on the ceiling is an alarming sight. Not only does it mar the appearance of your home, but it also indicates an ongoing leak that could potentially cause hidden damage.
However, there’s no need to panic. Repairing a water stain is a relatively simple process. By following this easy-to-follow guide, you’ll be well-prepared to address any discoloration you come across on your ceilings.
Step 1: Identify the Source Begin by checking if there is any water present on the floor below the stain. This will help you determine if the leak is still active and the extent of the water flow.
If you find water on the floor, place towels or buckets beneath the leak to collect any dripping water. Taking swift action to address this excess water is crucial as it can lead to staining of carpets and warping of wooden floors.
While it might be tempting to fix floor damage immediately, it’s advisable to wait until you’ve completed all the ceiling repairs, including painting. This precaution ensures that you won’t accidentally spill paint on a new rug or freshly installed hardwood floors.

To stop the leak
first, identify the possible causes, such as worn gaskets or failed fittings. Even if the pipes appear dry, it’s essential to verify if the leak persists. One way to do this is by running water into the fixture above the stained area. For instance, fill up and drain your bathtub to check if the problem reoccurs.
If you do find a leak, you have two options: hire a plumber or attempt to fix it yourself. Many plumbing repairs are relatively straightforward and can be tackled by most homeowners who are willing to give it a try. It’s worth noting that some older water stains might be the result of a past plumbing leak that was repaired, but the stain itself was never properly dealt with.
To fix the water stain on the ceiling, follow these steps:
- Determine if the ceiling is wet or just stained, focusing on areas below bathroom fixtures where water stains are common.
- If the ceiling is wet, use a drill bit to create a small hole in the center of the water stain. Have a bucket ready to catch any additional water trapped behind the ceiling.

- Check for any signs of mold growth in the ceiling space and on the back of the removed drywall paper (rookie tip: mold thrives in dark and damp environments, making wet ceiling spaces ideal for its growth).
- Address the underlying plumbing issue causing the leak. You can either fix it yourself if you’re confident in your skills or hire a professional plumber.
- Before proceeding with the ceiling repair, ensure that both the drywall and joists in the ceiling are completely dry. Patching a drywall hole in the ceiling can be challenging for beginners, so consider hiring a professional for this part if you’re unsure about your joint compound skills.
- Once the drywall patch is complete, apply two coats of primer and two coats of flat paint to the repaired area.
- Feather the paint at the edges of the repair to blend it seamlessly with the rest of the ceiling.
Remember, if you encounter any mold that you’re unsure about during the process, stop working immediately and seek professional assistance. Mold can be hazardous, and it’s essential to handle it with caution.
If the ceiling is dry and the source of the stain is not obvious, you can follow these steps to address it:
- Consider cutting a hole in your ceiling using a drywall knife to expose the area above the stain. Look for any signs of wet or dripping pipes in that space. Sometimes, slow and steady leaks from tubs or showers may occur intermittently, leading to water stains.
- If you are certain that you are dealing with an old stain and there is no active problem, cutting into the ceiling may not be necessary. However, if you have concerns about the presence of mold, it’s advisable to check the area.
- If you haven’t replaced any drywall, use a blocking primer along with your chosen paint color to conceal the stain.
- After patching the drywall, apply two coats of primer and two coats of flat paint to the affected area.
Rookie tip: Oil-based primers are more effective at hiding stains compared to water-based primers, but they can be more challenging to work with and clean. On the other hand, water-based primers might require an extra coat to hide stains adequately, but they are easier to clean using soap and water.
While water leaks can be troublesome, a little drywall work, primer, and paint can go a long way in restoring your ceiling to a spotless condition.

